
Agents
MCP Servers
Browse a catalog of MCP servers and install them into a project in one click, so the agents working there get extra tools.
Read about this part of Runova on the Agents page.
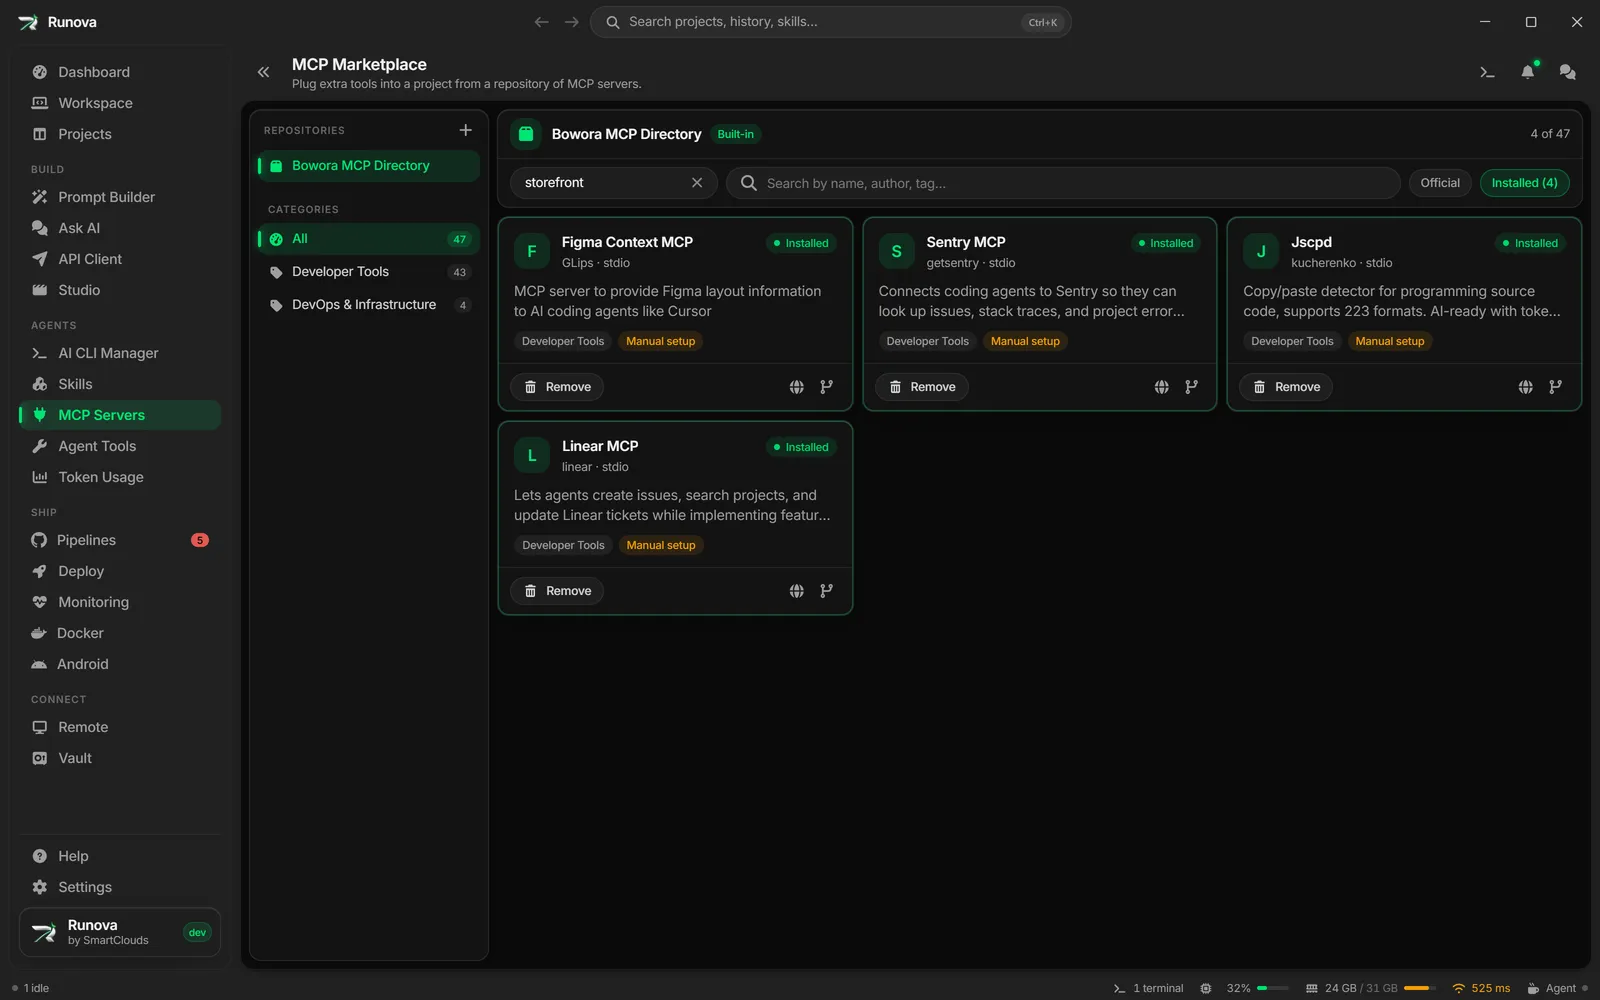
MCP (Model Context Protocol) servers give an AI agent extra tools, such as talking to GitHub, a database or a payment API. The MCP Servers page is a marketplace: you pick a project, pick a server, and Runova writes the server into that project’s .mcp.json file, which MCP-aware agents like Claude Code read. You can also add your own repositories of servers.
Where to find it
Click MCP Servers in the sidebar under Agents, or open the command palette and type “MCP”. The page title reads MCP Marketplace. You can also open it from a project: the project’s MCP tab has a Browse marketplace button that opens this page with that project already chosen.
How it works
Installing a server is project-based. Runova adds an entry for the server to the .mcp.json file in the project’s folder and keeps a small record of what it installed (the server, the repository it came from and the version). Removing a server deletes that entry again. Servers are not installed globally from this page, so choose the project you want first.
The page
Choose a project
Use the Project picker at the top left. Until you choose one, the project box is outlined in a warning color, a hint says “Choose a project to install servers into it”, and every Install button is disabled. Once a project is chosen, installed servers show an Installed badge and a green outline.
Choose a repository
The Repository picker selects where the catalog comes from. The first repository is selected for you.
- Bowora MCP Directory is built in. It is bundled with Runova (47 servers, mostly under Developer Tools, plus a few DevOps and Infrastructure ones), so it works offline and cannot be refreshed or removed. It carries a Built-in badge.
- Any repository you add yourself shows a refresh button and a remove button next to the picker.
Search and filters
- The Search box matches name, description, category, author and tags.
- When a repository has more than one category, a row of chips lets you filter by category (All plus each category).
- Official shows only servers maintained by the vendor behind them. Official servers carry a blue check mark on their card.
- Installed (N) appears once a project is chosen and shows only the servers already installed in it.
- A counter on the right shows how many servers match (for example “12 of 47”) and how many are in the chosen project.
- If filters hide everything, Clear filters resets them.
Servers are sorted by popularity, then by name.
Server cards
Each card shows a letter icon, the server name, its category (when the repository has several), a short description, the author, the version (when it is a specific one) and its transport (stdio for a local program, or an HTTP-based type for a remote one). The buttons are:
- Install adds the server to the chosen project. While it works the button reads Installing….
- Remove (instead of Install, when the server is already installed) removes it from the chosen project. Runova asks you to confirm.
- A globe icon opens the server’s website, and a branch icon opens its source repository.
A card marked Manual setup has no command or URL that Runova could parse, so its Install button is disabled. It is listed for discovery only, so follow the server’s own docs to set it up.
Install a server
- Choose a Project at the top.
- Find the server (search or filter) and click Install.
- If the server needs secrets, a Configure <server> dialog appears. Fill in every field (they are masked, like passwords) and click Install. The values are written into the project’s
.mcp.jsonunder that server’senv, so be careful not to commit that file to a public repository. Install stays disabled until every field has a value. - When the toast says “MCP server installed”, restart or reload the agent in that project so it picks up the new server.
Warning: API keys you enter in the Configure dialog are stored in plain text in the project’s
.mcp.json. Add that file to.gitignoreif the project is shared.
Remove a server
Click Remove on an installed server’s card and confirm, or open the project’s MCP tab and click the trash icon next to the server. Either way, Runova deletes the server’s entry from .mcp.json and from its install record.
Add your own repository
A repository is a catalog of MCP servers described by a repository.json index.
- Click Add repository.
- Enter a Name (required).
- Choose the Type:
- Local folder: click the folder icon to browse. The folder must contain a
repository.json. - Git repository: a URL such as
https://github.com/org/mcp-servers.git. Runova clones it and pulls updates when you refresh. The repository needs arepository.jsonat its root. - URL (JSON index): a link to a
repository.jsonfile, for examplehttps://example.com/repository.json.
- Local folder: click the folder icon to browse. The folder must contain a
- Click Add.
To pick up changes later, select the repository and click the refresh button. If a repository cannot be loaded, the page says “Couldn’t load this repository” with a Try again button.
To remove a repository, select it and click the trash button. This only removes it from Runova, and servers already installed in projects stay put.
Empty states
- An empty repository shows “<name> is empty” with a hint to refresh it or add another one.
- If you have no matches, the page says “No servers match” and offers Clear filters.
The project’s MCP tab
A project’s MCP tab (see Projects) lists the servers installed in that project with their versions. From there you can remove a server with the trash icon, or click Browse marketplace to add more.
Tips
- Start with Official servers when you can. They are maintained by the vendor.
- Install a server into one project first and try it before adding it to others.
- Check what a server’s command does before installing it. Many servers run through
npx, which downloads and runs a package, so you need Node.js. - Pair MCP servers with Skills and Agent Tools to shape what your agents can do.