
Deploy
Websites and certificates
Put an app on a domain with nginx, apply changes safely, read site logs, get Let's Encrypt certificates, and reach the core through its own domain or Direct TLS when SSH is not available.
Read about this part of Runova on the Ship page.
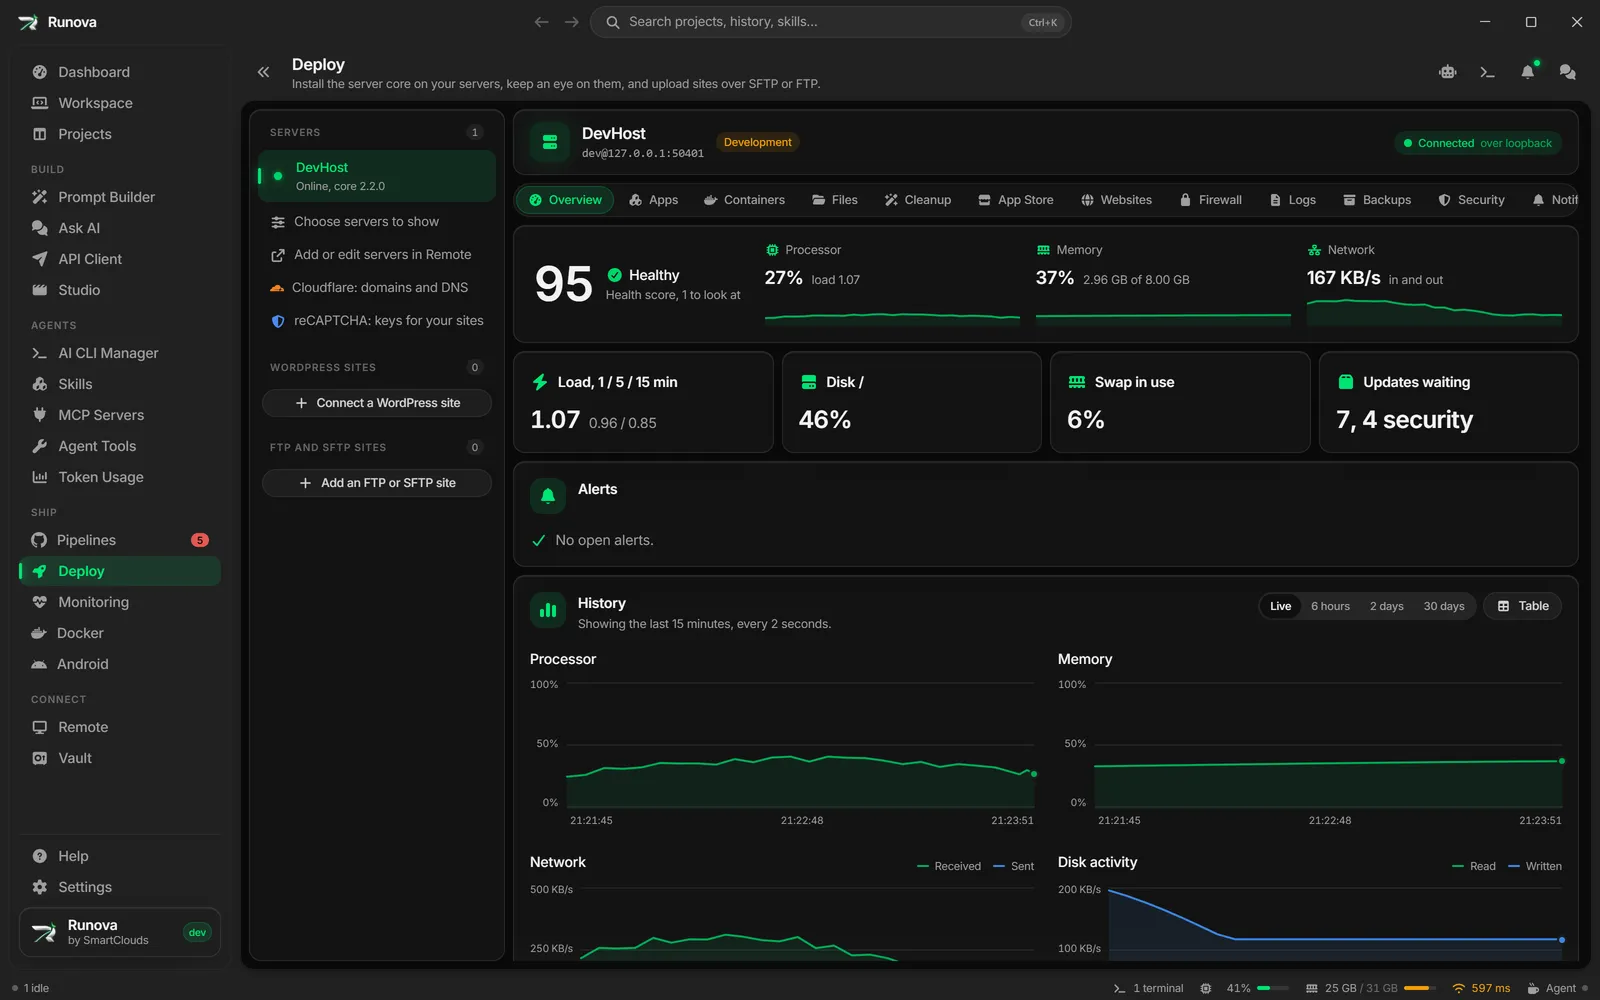
The Websites section of a server in Deploy manages nginx on that server. You add a site (a domain), say where its traffic goes (a port on the server or another address), tune it, and then Apply the saved changes to put them live. The same section issues and renews free Let’s Encrypt certificates. Two separate parts of Deploy, the core domain and Direct TLS, let your computer reach the server core without SSH.
Where to find it
Click Deploy in the sidebar under Ship, pick a server in the rail on the left, then click Websites in the strip of sections (Overview, Apps, Containers, App Store, Websites, Firewall, Logs, Security). The server needs its core installed and you must be signed in to it (see Servers and setup). The core domain and Direct TLS live in Security, on the Connection tab.
You can also arrive here from Cloudflare: after you point a domain at a server, a button there opens the Websites section with a new site already filled in.
Who can do what
The Websites section is visible to everyone who is signed in to the server core, but your role decides what you can change.
| Role | What you can do in Websites |
|---|---|
| Viewer, Operator | Look at sites, routes, certificates and logs. Fields are read-only and the button says View instead of Edit. |
| Admin | Add, edit and delete sites, proxies and certificates, set up nginx, and apply changes. |
| Owner | Everything an Admin can do, plus custom nginx directives (the Advanced tab), the core domain and Direct TLS. |
The server core checks your role again on every call, so hiding a button is only a convenience.
nginx on the server
The first card, nginx, shows the web server in front of your apps:
- Installed (or “not yet”), Running or Not running, and Managed by Runova (or Not set up yet) with the current release name.
- The version, and “from nginx.org” when it came from the official packages.
- When the last apply happened and who did it.
If nginx is not managed yet, an Admin sees one button:
- Install nginx when nginx is missing. Runova installs it from the official nginx.org packages and sets it up for your sites.
- Set up nginx for Runova when nginx is already there. Runova takes it over: it backs up and turns off the stock default site, and adds its own sites next to what you have.
Either button runs as a background job and opens a log window so you can watch it. You need a managed nginx before you can add sites.
If the nginx build has no stream module, the card says so, and TCP and UDP proxies are not available.
Sites
The Websites card lists every site as a route map, from left to right:
- The domain (with a count such as +2 when the site has more names), a lock and the certificate state, for example “SSL, 62 days”, “No SSL”, “Expired” or “Revoked”. Click it to open the SSL tab.
- nginx, with small chips for what it does on the way: cache, websocket, gzip, https only, password, ip allowlist, rate limit, custom. Click it to open the Performance tab.
- The upstream, where requests go (for example
web:3000orhttp://10.0.0.5:8080). Click it to open the Proxy tab.
Each row also says Live or Not applied yet, and has an Edit (or View) button that opens the site editor on the Domains tab. When there are no sites the card says “No sites yet. Add one to put an app on a domain.”
Add a site
- In the Websites card click Add a site (Admins only, and only once nginx is managed).
- On the Domains tab, type the domain in Domain 1, for example
app.example.com. Click Add a domain for more names, such aswww.example.com. Use*.example.comfor every subdomain. Point each name at this server in DNS first. - The Id (lowercase letters, digits and hyphens) follows your first domain, or you can type your own. It names the site’s files and logs on the server and cannot be changed after the first save.
- Open the Proxy tab and choose where traffic goes.
- Click Save the site. Saving stores the site on the server but does not put it live.
- After the first save the editor jumps to the SSL tab so you can issue a certificate.
- Click Apply changes in the bar at the top of the section to go live.
To edit a site later, click Edit on its row (or a stop on its route map), change what you need and click Save changes. All sites takes you back to the list. Delete removes a site: the site, its settings and its certificate go with the next apply, and its app keeps running.
Fields are checked as you type and again by the server. A tab with problems shows a warning count next to its name.
Domains tab
Lists every name the site answers to (up to 50) and the site Id. Each domain can be removed with the trash button when there is more than one.
Proxy tab
Sets the Upstream, where nginx passes each request:
- A port on this server: an app or stack service listening on 127.0.0.1. Fill in Service name (shown on the route map, optional, for example
web) and Port (for example3000). - An address: any
http://orhttps://URL nginx can reach, such ashttp://10.0.0.5:8080. Two extra switches appear: Check the upstream’s certificate (turn off only for a self-signed certificate you trust) and Send the upstream’s own host name (instead of the domain the visitor asked for, which some hosted services need).
Under Connections, WebSockets lets live connections (chat, dashboards, hot reload) through to the app.
SSL tab
Holds the certificate and the HTTPS options. See Certificates below.
Performance tab
- Compression: Gzip compresses text responses (on by default).
- Proxy cache: Cache responses makes nginx keep successful responses and serve them again without asking the app. When on, set Keep for (seconds, default 600), Up to (MB on disk, default 256) and Skip the cache for these cookies (comma separated, such as
sessionid, wordpress_logged_in, so signed-in pages stay fresh). - Limits: Largest request body in MB (empty keeps nginx’s 1 MB, 0 means no limit), and Connect timeout, Read timeout and Send timeout in seconds (default 60).
Security tab
- Security headers: Add security headers turns on a group of response headers (on by default). Inside it: X-Content-Type-Options: nosniff, X-Frame-Options (only this site may frame it, no site may frame it, or do not send) and Referrer-Policy (several standard values, or do not send).
- Custom headers: Add a header adds a name and value pair sent with every response, for example
X-Robots-Tagwithnoindex. - IP rules: Allow only (one address or network per line; with an allow list everyone else is turned away) and Block (checked before the allow list). Example lines:
203.0.113.4and10.0.0.0/8. - Password protection: switch on Basic auth so the browser asks for a user name and password first. Set the Prompt text, then Add a user with a name and password. For a user that is already saved the password box says “Unchanged”.
- Rate limit: switch on Limit requests to cap how many requests one visitor’s address can make before nginx answers 429. Set Requests, Per (second or minute) and Burst (extra requests let through at once), and Serve a burst at once (off spreads the extra requests out).
Advanced tab
Custom nginx directives, for Owners only. Other roles see a note that only an Owner can change them.
- Server block is added inside the site’s
server { }block, after the settings above. - Location block is added inside
location / { }, next to the proxy settings.
Click Review the change to see a side-by-side diff, then Save directives. Nothing is saved before you have seen the diff. The server checks the directives against an allowlist, and anything it refuses is marked on its line in the editor. Saved directives go live with the next apply, and nginx keeps running what it has if they fail its check. The tab needs a saved site first.
Logs tab
For a saved site, the Logs tab follows nginx’s Access log and Error log live. Switch between them with the two buttons. The text is shown as plain text only. The status line says Following live or Stopped, and tells you when nginx rotated the log file (older lines are then gone from the view). Keep scrolled to the newest line can be turned off to read in peace. In the error log, error lines are red and warnings are amber. For logs of the whole server see Assistant and logs.
Apply changes
Saving a site does not touch the live nginx. Saved changes wait in the Apply changes bar at the top of the Websites section: “Saved changes are waiting. Apply them to put them live.”
- Click Apply changes (Admins only).
- Runova renders every site, checks the configuration with
nginx -tand reloads nginx. The bar says it can take some 20 seconds. - When it works you see “Applied.” and the sites change from Not applied yet to Live. If nginx reported warnings, they are listed in the bar.
- When it fails, nginx keeps running what it had, the bar turns red with “nginx kept running what it had” and lists each problem. Click a problem to open the site and field it is about. Fix it, save, and click Apply again.
Note: A failed apply never takes your live sites down. The previous configuration stays in place until a new one passes the check.
TCP and UDP proxies
The TCP and UDP proxies card is for databases, game servers and anything else that is not a website. It needs a managed nginx with the stream module.
- Click Add a proxy (Admins only).
- Fill in Id, Protocol (TCP or UDP), Public port, and Passes to (an address and port such as
127.0.0.1:5432). - Optionally list Allow only these addresses, one per line. Empty means anyone can connect.
- Click Save the proxy, then Apply changes.
Each row shows the protocol and port, where it passes to, how many addresses are allowed (or “open to anyone”), and Live or Not applied yet. Use the pencil to edit and the trash to delete (the port closes with the next apply).
Warning: nginx opening a port is not enough. The firewall still has to let the port in. See Firewall and security.
Certificates
A site’s certificate lives on its SSL tab. The Certificate section needs a saved site first.
Reading the state
The tab shows a badge such as “SSL, 62 days”, “SSL, last day”, “No SSL”, “Expired” or “Revoked”, with “(staging)” for test certificates. When a certificate exists you also see what it Covers, Issued by (marked uploaded or Cloudflare Origin CA when that applies), the Valid dates, the Renewal line and the Last attempt with its result. Show its log opens the job log of the last attempt.
The Renewal line tells you what happens next: renews automatically around a date, the last renewal attempts failed and when the next try is, or (for uploaded and Cloudflare Origin CA certificates) that you must replace it yourself before it runs out.
Issue a Let’s Encrypt certificate
- On the SSL tab click Issue a certificate (or Issue a new certificate to replace one).
- Optionally enter a Contact email. Let’s Encrypt writes there only about problems.
- Choose how to prove you own the names:
- By default Let’s Encrypt checks that the domains reach this server over port 80, then issues one certificate for all of them.
- Validate over DNS (Cloudflare DNS-01) works behind the Cloudflare proxy and with port 80 closed. It is only available when this server holds a Cloudflare DNS token for the zone of every domain. A wildcard name is always validated over DNS. See Cloudflare.
- Use the staging CA does a test run with generous limits. Browsers will not trust the result.
- Tick I accept the Let’s Encrypt Subscriber Agreement. The Issue the certificate button stays disabled until you do.
- Click Issue the certificate. A log window follows the job.
Certificates renew by themselves. Renew now appears for Let’s Encrypt certificates if you want to renew immediately.
Tip: If issuing fails over port 80, check that the domain really points at this server, that the firewall lets port 80 through, and that Cloudflare’s proxy is not in the way. With a Cloudflare DNS token you can use DNS validation instead.
Upload your own certificate
Click Upload a certificate, paste the certificate with its chain and the private key (both PEM), and click Upload and apply. The key goes straight to the server and is not kept on your computer. An uploaded certificate does not renew by itself.
Cloudflare Origin CA
Click Cloudflare Origin CA to have Cloudflare sign a certificate for a key the server makes (the key never leaves the server). Only Cloudflare trusts it, so keep the site’s DNS records proxied and set Cloudflare’s SSL/TLS mode to Full (strict). It replaces the current certificate. This needs the extra “Zone > SSL and Certificates > Edit” permission on your Cloudflare token. If it is missing, Runova tells you exactly what to add.
Remove a certificate
Click Remove. The site is served over plain HTTP afterwards and Force HTTPS and HSTS are turned off. For a Let’s Encrypt certificate you can tick Also revoke it at the CA, which you should do if its private key may have leaked. The button is Remove the certificate, and Keep it cancels. Removing a certificate asks for your password on the server core again (it counts for the next 10 minutes).
HTTPS options
These switches work once the site has a certificate and take effect with the next apply:
- Force HTTPS sends every plain HTTP visitor to the HTTPS address.
- HSTS tells browsers to use HTTPS only for as long as the Max-age (seconds, default one year) says. Include subdomains and Preload are optional. Preload asks to be built into browsers and needs subdomains and a year or more.
- HTTP/2 gives faster page loads over HTTPS (on by default, and it does not need a certificate to switch).
Warning: HSTS is hard to take back, because browsers remember it. Turn it on only when HTTPS works everywhere on the domain.
Core domain
Normally your computer talks to the server core through SSH, so closing the SSH port in a firewall cuts the app off. The core domain puts the core behind a domain of its own, such as core.example.com, served by nginx over HTTPS. nginx asks each computer for a client certificate made from its device key, and the core checks it against the enrolled devices on every request. The usual sign-in, sessions and roles apply on top.
Open Deploy, pick the server, click Security, then the Connection tab. Everyone signed in can see how it stands. Only an Owner can change it, and an Admin can get its certificate.
Before you start
- nginx installed and running. The core domain is an nginx site, so install nginx under Websites first. Until it runs, the card says so and keeps its form disabled.
- DNS only. Point an A record (and AAAA, if the server has IPv6) for the domain straight at the server. On Cloudflare, keep the proxy off for that record (the grey cloud). A proxy ends HTTPS itself and never passes your computer’s device certificate on, so the core would refuse every request.
- Ports 80 and 443 open in the firewall. Port 80 is only used for Let’s Encrypt and to send visitors to HTTPS.
- The Cloudflare origin lock off. It lets only Cloudflare reach ports 80 and 443.
Turn it on
- As an Owner, enter the Domain and, if you like, Allowed from (addresses or networks, one per line, empty for any address).
- Click Turn on the core domain. You may be asked for your password again if you have not confirmed it in the last 10 minutes.
- Click Get a certificate and issue one from Let’s Encrypt. Until the domain has a certificate it only answers Let’s Encrypt over port 80, never the core.
- Once the card says “On, answering at” the domain, click Check from this computer. When the check passes, this computer connects through the domain first, then Direct TLS, then SSH. If Cloudflare answers for the domain, the check says so and explains how to turn the proxy off.
The domain’s site is managed here, not in the Websites list. Change domain or sources edits it (a new domain needs a new certificate), and Turn off takes the site out of nginx and sends every computer back to Direct TLS or SSH.
Direct TLS
Normally your computer talks to the server core through SSH. Direct TLS adds another way in: the core’s own HTTPS port, for when SSH is not available. Each computer proves itself with a client certificate made from its device key, and checks the core’s key against a pin that was read over SSH. When the port does not answer, the app falls back to SSH as before.
Open Deploy, pick the server, click Security, then the Connection tab. Everyone signed in can see how it stands. Only an Owner can change it.
What the card shows
- Status: Off, “On, listening on port N”, or “On, but the port is not open” (with the reason).
- Address: host and port.
- Allowed from: the addresses allowed to connect, or “Any address (a client certificate is still required)”.
- Server key pin:
sha256/...with a copy button, and when this computer took the pin. - This computer: whether it tries direct TLS first then SSH, or SSH only, and what the live connection rides on right now.
- Last changed and by whom.
Turn it on
- As an Owner, set the Port (TCP, 1024 to 65535) and Allowed from (addresses or networks, one per line, empty for any address).
- Click Turn on direct TLS. You may be asked for your password again if you have not confirmed it in the last 10 minutes.
- A firewall review dialog opens with the rule that lets the port in. Direct TLS uses the same safe apply as the Firewall section, with its lockout guard, the exact commands and a countdown that undoes the change unless you keep it. See Firewall and security.
Change or turn off
Use Change port or sources to edit the settings (moving the port also proposes closing the old one), or Turn off to close the port. Turning off warns that computers that cannot use SSH lose access to the core, and then offers the firewall change that closes the port.
When the server key changes
If the core presents a different key than the pin on your computer, a red banner says “The server key changed”. Direct TLS stays refused on this computer, and nothing falls back to it quietly, until an Owner clicks Trust the new key. That is expected after the core was reinstalled without its data. If you did not expect it, keep the old pin and check the server, because something may be intercepting the connection.
Tips
- Always save, then apply. The bar at the top of Websites shows when saved changes are still waiting.
- Issue the certificate before turning on Force HTTPS and HSTS.
- Use the staging CA to rehearse a certificate setup without hitting Let’s Encrypt’s real limits.
- A site’s id cannot change after the first save, so pick one you like.
- Ask the Deploy assistant to explain a failed apply, or search the Help center for more.